
Pencil Tool vs. Brush Tool: When to Use Each in Adobe Photoshop
Pencil Tool vs. Brush Tool: When to Use Each in Adobe Photoshop
Introduction: In the past, we have covered the Pencil Tool as well as a Brush Tool in Adobe Photoshop seperately in the blog, and today we are going to compare them in detail, and hopefully shed some light on your own illustration practice. In the dynamic world of Adobe Photoshop, every tool has a specific role and unique capabilities. Two such tools, the Pencil and Brush, are staples in digital artwork creation. While they might appear similar, they serve different purposes in image manipulation and graphic design. This post delves into the nuances of these tools, helping you choose the right one for your project.
1. The Pencil Tool:

Pencil Tool
Precision and Pixel-Perfect Edits The Pencil tool is the epitome of precision in Photoshop. Its primary use is for creating hard-edged lines and detailed, pixel-level work.
Pixel Precision: Perfect for editing images where every pixel counts, like pixel art or sharp, line-based drawings.
No Anti-Aliasing: It produces a hard edge without softness or gradient, ensuring clarity and crispness in lines.
Color Accuracy: The Pencil tool applies color exactly as selected, without any variations due to blending or opacity changes.

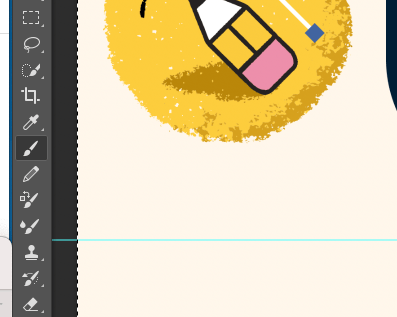
Pencil Tool in Action
2. The Brush Tool:
Brush tool offers a more fluid and dynamic approach to digital painting and image editing. It is the go-to tool for creating a painterly look
Rich Textures: With a range of customizable brushes, it can mimic everything from watercolor washes to oil painting strokes.
Pressure Sensitivity: When used with a graphic tablet, it responds to pressure, mimicking the natural variation in line width and opacity seen in traditional media.
Blending and Gradients: Ideal for creating smooth gradients and blended effects, useful in digital painting, and photo retouching.
An example of a marker brush
3. Additional Comparison Points
Opacity Control: The Brush tool offers adjustable opacity, allowing for the creation of semi-transparent strokes, unlike the Pencil tool's solid, opaque lines.

Comparing Diff Opacity Settings
Flow Control: The Brush tool can adjust 'flow', affecting how paint builds up along a stroke, which is not a feature in the Pencil tool.

Comparing Diff Flow Settings
Eraser Compatibility: The Pencil tool's strokes can be erased with a hard-edged eraser for clean lines, while the Brush tool's strokes might require a softer eraser for seamless blending.
Size Variation: Both tools allow for size adjustments, but the Brush tool's range and variability are much more significant, catering to broader artistic needs.

Adjust the size and hardness of a brush in in Adobe Photoshop
4. When to Use Each Tool
Pencil Tool is Ideal for:
Creating pixel art or raster images requires precise pixel manipulation.
Sharp, detailed line work in illustrations or graphic designs.
Situations where anti-aliasing may interfere with the clarity of the image.
Brush Tool is Best for:
Digital paintings that replicate traditional art styles.
Applying varied textures and depth in photo editing or digital art.
Creating natural, organic shapes or elements with smooth transitions.
Conclusion:
The Pencil and Brush tools in Adobe Photoshop serve distinct but equally valuable roles in the realm of digital art and image editing. Understanding their specific characteristics – the Pencil tool's pixel precision and the Brush tool's fluid dynamics – allows artists to make informed choices based on the needs of their project. Whether creating pixel-perfect images or emulating traditional painting techniques, knowing when and how to use each tool will greatly enhance your Photoshop expertise.

About Esther Nariyoshi
Hi, I am an illustrator who loves exploring both traditional and digital mediums. I've had the joy of collaborating with some wonderful folks, like Cloud9 Fabrics, and MSU Broad Art Museum, and sharing some tidbits of my creative process through UPPERCASE Magazine. My heart finds joy in food and nature illustrations, and occasionally, I share my creative process on my YouTube Channel. If you love art or need inspiration, join me on Skillshare or YouTube tutorials.

Skip hours of sifting through generalized tutorials, and enjoy a personalized learning session with a laser focus. In a 1-on-1 session, you will receive personalized instruction on how to elevate your digital illustration to the next level based on your own artistic style and preference using Procreate, Adobe Illustrator, and Photoshop, as well as your paper sketchbook.


Premium Digital Brushes for Artists: Created by an Illustrator, for Illustrators. These expertly crafted digital brushes are designed to enhance your artistic workflow in digital illustration.

Free Procreate Brushes Free Adobe Illustrator Brushes as well as other helpful resources to get you started in digital Illustration
Next Steps

Beginner friendly classes on Adobe Illustrator