
Adobe Illustrator For Beginners: How to Draw and Edit Basic Shapes
This beginner-friendly post was adapted from my video tutorial Make Simple Shapes in Adobe Illustrator for Beginners | Quick Snack Series Season 1 EP1. The Quick Snack Series, where I explain how to use Adobe Illustrator in short episodes for designers and illustrators of all skill levels. I am also a Skillshare Top Teacher sharing jam-packed classes on various topics on digital illustration.
Adobe Illustrator is an industry-leading tool to create vector graphics. And it all starts with the most basic shapes. The skills to create those geometric shapes Illustrator offers are essential because many complex shapes are built by the basic shapes. In the tutorial below, we will explore shape tools and beyond to ease us in vector illustration. We will start with a single shape and build our way up. Buckle up. Let's go.
How to make a rectangle
Adobe Illustrator offers options to make basic geometric shapes under the Shape Group or Shape Tool. The Rectangle Tool is located in the tools panel as default. You can click the rectangle icon to draw rectangles and squares. When you click and hold (long click) the rectangle icon, you will see a pop-up menu that shows you a list of built-in shapes and their associated keyboard shortcuts. Once you select, the icon will remain the last used tool within the Shape Tool group.
How to use the Rectangle Tool

Rectangle Tool
Select the Rectangle Tool. Or press L on your keyboard
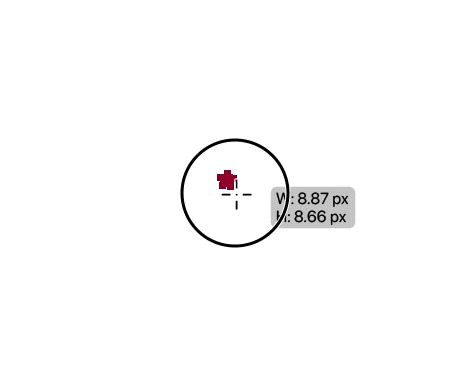
Click and drag on the artboard to define the shape
Release the mouse button to finalize the rectangle
◤ Tip: the small gray label with numbers shows you the size of the shapes you create
How to make a perfect square
If you think about it, a perfect square is just a unique rectangle, where all sides are at the same length.
With the Rectangle Tool Selected
You can create a perfect square by holding the Shift key while dragging

The Rectangle Tool in Tool Panel flyout menu
How to apply a fill color and a stroke color
Shapes in Adobe Illustrator have at least two properties: stroke and fill.

fill and stroke colors
And these properties can be easily changed to adapt to your needs.
Use the Selection Tool (click on the icon below or press V on your keyboard) to select any shape(s) in view
double-click the color fill (the solid square) or the stroke (the outline) at the bottom of the Tools panel to select a color with the color picker

color picker
◤ Tip: you can switch the position by pressing X on your keyboard as a shortcut
How to create rectangles with specific dimensions
Sometimes a project calls for specific dimensions (e.g., stationery products, business cards, posters, etc.). Adobe Illustrator can help you create shapes to a tee.
Select a shape from the shape group, in this case, rectangle.
Click once (anywhere) on the artboard (as opposed to click and drag as shown before)
Type the desired dimension for the shape as well as the unit
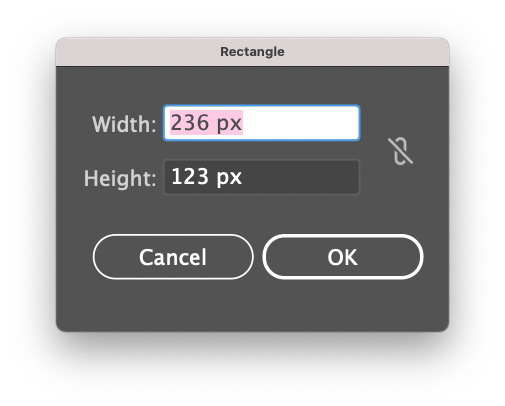
How to create shapes of specific dimension
You can save some brainpower by letting Adobe Illustrator do the math as well.

How to create shapes of specific dimension with math
◤ Tip: Though the example above applies to rectangles, the step above applies to any shapes in the shape group.
How to make an ellipse/oval/circle
Creating ellipse/ovals or circles is very similar to creating rectangles. The Ellipse Tool is tugged under the rounded rectangle tool.

Ellipse Tool
Select Ellipse Tool or Press L
Click and drag on the artboard to the desired dimension

How to draw an oval
◤ Tip: You may create a perfect circle by holding the Shift key while dragging
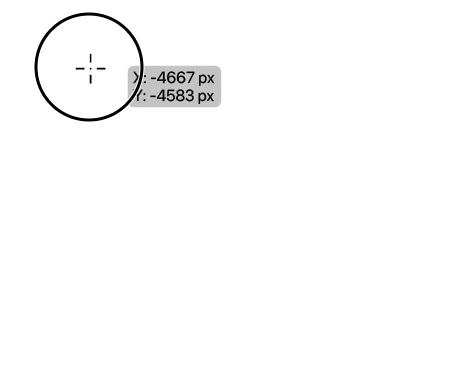
Creating a perfect circle holding Shift key
◤ Tip: You can create a shape from the center by holding the Alt key (Windows) or the Option key (Mac OS) while dragging
How to use polygon shapes and triangle shapes
The Polygon Tool is the hexagon icon in the Shape Group. In short, most of the functions are identical to shapes we have covered before:
Click and drag to draw
Drawing from the center by holding the Alt key (Windows) or the Option key (Mac OS)
Change Fill and Stroke color
But, a few things are unique to the Polygon Tool
Straighten up the shape orientation by holding the Shift keywhile dragging

Straighten up the shape while drawing
Move the pointer in rotating motion to rotate the shape while creating the polygon.

Rotate the polygon while drawing the shape
If the polygon shape is already created, you can always cover over a corner and rotate after your pointer turns into a double-arrowed curve below.

Rotate the polygon after a shape is made
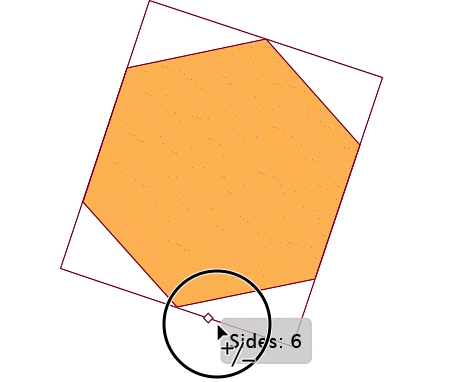
Change the number of sides in two methods
Method 1: Press the up or down arrow key while dragging
Press the up or down arrow key while dragging
Method 2: click on the tiny diamond (side widget) and drag along the bounding box
"
How to use Star Tool
"
◤ Tip: The Star Tool is very similar to the Polygon Tool in the following ways, you can
Straighten up the shape orientation by holding the Shift key while dragging
Press the up or down arrow key while dragging to change the # of sides

Change the number of sides by pressing the up-down arrows
How to use Line Segment Tool
It will be amiss if we don't cover the essential line drawing tool: Line Segment Tool. This tool is located next to the Text Tool. You can find its icon in the tools panel (/)

Line segment tool
The use of the tool is pretty straightforward—the simple click and drag.
Like many shape tools in Adobe Illustrator, you can hold the Shift key while dragging to constrain the angle to multiples of 45 degrees. It's hands-down the quickest way to draw a straight line, esp. horizontal and vertical lines.
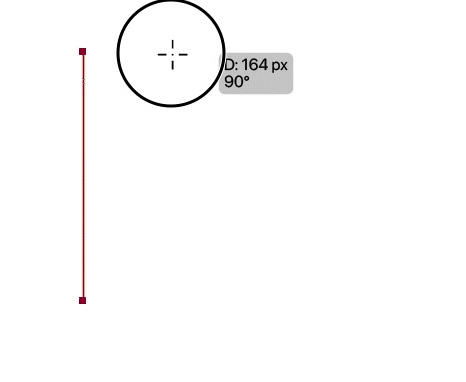
Using the Segment Tool while holding the shift Key
How to duplicate shapes
There are quite a few ways to duplicate shapes inside the program. I will walk you through 2 of the most common ones.
Method 1: The good ole Copy and Paste
Press command on a Mac (or Ctrl on a PC) + C to copy
Press command on a Mac (or Ctrl on a PC) + P to paste
◤ Tip: You can also find the commands in Edit>Copy and Edit>Paste, but hotkeys are always a much-recommended alternative.
You don't control where things go, but this method is intuitive and quick.
Method 2: Hold the Alt key (Windows) or the Option key (Mac OS) and drag
How to create a copy
◤ Tip: You have control over the location of the same shape.
◤ Tip: Hold the Shift key while dragging can constrain the movements to the multiples of 45 degrees (i.e., horizontal, vertical, etc.)
How to edit shapes
Shapes you create in Adobe Illustrators are live, which means you can easily edit them on the fly. Here are a few ways of changing the properties:
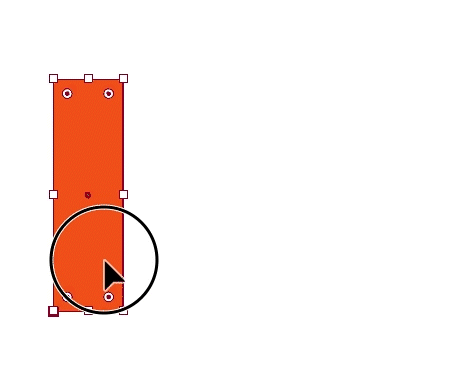
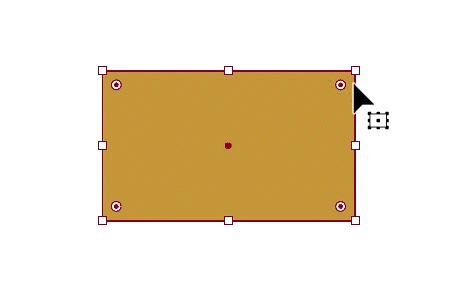
Select the shape using the Selection Tool (V), then the pointer turns into a double-arrow and drags to adjust the size
Similarly, hover over the corner, then the pointer turns into a double-arrowed curve and moves around to rotate
How to change the size of a shape in Adobe Illustrator
◤ Tip: Hold the Shift key to maintain the original ratio
How to draw rounded corners
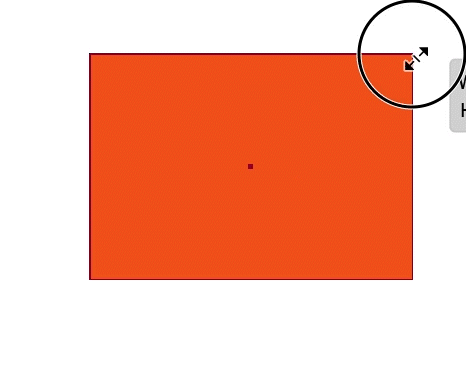
You may have noticed the tiny circles inside the corners of a shape. They are your besties when it comes to creating rounded corners.
Select the corner point using the Direct Selection Tool (A)
Drag until you are happy with the size
How to create rounded corners
A quick word on the Shape Builder tool
In addition to the tools, we have shared. I want to quickly touch on the Shape Builder tool before we wrap up. The Shape Builder Tool is one of the most visual and intuitive ways to build complex shapes in Illustrator (i.e., combining shapes, etc.). It certainly deserves a dedicated blog post for itself. But I can't leave you without at least giving you a taste, so here are a couple of quick examples using the Shape Builder Tool:
Example 1: To add shapes and objects
Create two or more overlapping shapes
Select all the shapes by click-and-dragging using the selection tool
◤ Tip: You can select multiple objects/shapes by holding the Shift key while using the selection tool
Select the Shape Builder Tool in the panel, or press Shift + M (a "+" sign shows up right under the pointer)

Create 2 or more overlapping shapes
Click and drag across all the shapes you want to combine
Tada! A new compound shape is born.
Example 2: To subtract shapes and objects
Create two or more shapes with overlapped areas
Select all the shapes
Activate the Shape Builder Tool (Shift + M)
Hold the Alt key (Windows) or the Option key (Mac OS) (a "-" sign shows up right under the pointer) while you click or drag get rid of any parts of the shapes.
A few fun exercises
Above all, Adobe Illustrator is a powerful tool that can help you visually articulate your creative vision. However, the learning curve can feel intimidating initially. I have designed a few exercises below to help you practice what we have just covered. Try to create the shapes below on your own. I hope you will have loads of fun!


Conclusion
Well, it's a wrap. Congrats on taking steps to learn how to draw using shape tools. If you are reading this, you may be saying, "Hmm, this is a nice tutorial, but what kind of nerd would spend hours writing this?" The answer is very kind of nerd. I see colors and shapes and dream about drawing them. I hope you get to taste the joy of creating, too! That's why I have tons of resources like this. Ahem, keep reading.

About the Author
Hi, I am an illustrator who loves exploring both traditional and digital mediums. I've had the joy of collaborating with some wonderful folks, like Cloud9 Fabrics, and MSU Broad Art Museum, and sharing some tidbits of my creative process through UPPERCASE Magazine. My heart finds joy in food and nature illustrations, and occasionally, I share my creative process on my YouTube Channel. If you love art or need inspiration, join me on Skillshare or YouTube tutorials.

Skip hours of sifting through generalized tutorials, and enjoy a personalized learning session with a laser focus.


Premium Digital Brushes for Artists: Created by an Illustrator, for Illustrators. These expertly crafted digital brushes are designed to enhance your artistic workflow, offering precision, versatility, and exceptional quality tailored specifically for digital illustration.

Free Procreate Brushes Free Adobe Illustrator Brushes as well as other helpful resources to get you started in digital Illustration