
How to Create and Apply a Displacement Map in Adobe Photoshop

Creating a Displacement Map
Open the Image:
Start by opening the image you want to use as your displacement map. This image should be a grayscale version of your main image where the tones will dictate the displacement. Lighter tones will push pixels more, while darker tones will pull them back.
Desaturate the Image:
If the image isn’t already in grayscale, desaturate it by going to
Image>Mode>Grayscale. You can also useImage>Adjustments>Desaturate.

Adjust the Contrast:
Go to
Image>Adjustments>LevelsorCurvesto adjust the contrast. This will enhance the displacement effect.

Image > Adjustments > Levels or Curves
Save the Displacement Map:
Save this grayscale image as a PSD file by going to
File>Save As, and choose Photoshop PSD from the format dropdown. Name it so you can identify it as your displacement map.

Save this grayscale image as a PSD file by going to File > Save
Applying the Displacement Map
Open Your Main Image:
Open the image you want to apply the texture to.
Prepare the Layer:
If your image is a background layer, double-click it to turn it into a regular layer which can accept transparency.
Add the Texture or Design:
Open the texture or design you want to apply to your image.
Copy and paste it onto your main image as a new layer.
Adjust the size and position as necessary.
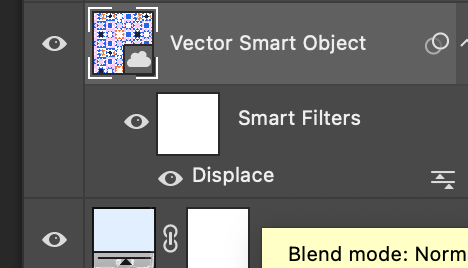
Apply the Displacement Map:
With the texture layer selected, go to
Filter>Distort>Displace.Set the horizontal and vertical scale. These values will determine how much the texture will be displaced. Start with lower values like 5 to 10.
Check "Stretch To Fit" and "Repeat Edge Pixels."
Click
OK. Photoshop will then ask you to select the displacement map file. Choose the .PSD file you saved earlier.

Refine the Effect:
The texture will now be distorted according to the displacement map. You may need to apply the filter a couple of times or undo (Ctrl/Cmd + Z) and retry with different settings for the best effect.
You can also change the blending mode of the texture layer to blend it more naturally with your main image. Common blending modes for this purpose are Overlay, Soft Light, Hard Light, or Multiply, depending on the desired outcome.
Fine-Tune:
Use layer masks, eraser tools, or opacity adjustments to refine where and how much of the texture appears on your main image.
Double-click the Displace every time you wish to make the adjustment to the map
Final Adjustments:
Make any final color adjustments or apply additional filters to blend everything together seamlessly.
Bonus Points:
When your displacement map is rich in texture, like the linen fabric below, your main image captures that! See the example below ->

Displacement Map
After the Displacement Map applied (see the linen texture?)

About Esther Nariyoshi
Hi, I'm Esther, a multidisciplinary illustrator and digital brush creator exploring all mediums, from paper to pixels. I've collaborated with Cloud9 Fabrics and MSU Broad Art Museum, and UPPERCASE Magazine. I teach illustration process through Esther's Art Lab that bridges traditional and digital workflows, from paper to pixel.s

Skip the guesswork and find your digital match. Learn the entire illustration process from paper to pixels. See how Procreate, Photoshop, and Illustrator handle three projects, then choose the one that fits your style.

Skip hours of sifting through generalized tutorials, and enjoy a personalized learning session with a laser focus. In a 1-on-1 session, you will receive personalized instruction on how to elevate your digital illustration to the next level based on your own artistic style and preference using Procreate, Adobe Illustrator, and Photoshop, as well as your paper sketchbook.


Premium Digital Brushes for Artists: Created by an Illustrator, for Illustrators. These expertly crafted digital brushes are designed to enhance your artistic workflow in digital illustration.
