
Understanding Layers in Adobe Photoshop: A Comprehensive Guide
Layers in Adobe Photoshop are a game-changer, offering unparalleled control over every aspect of image editing. This guide provides a step-by-step walkthrough on utilizing layers to their full potential, transforming the way you approach Photoshop projects.
1. What Are Layers?

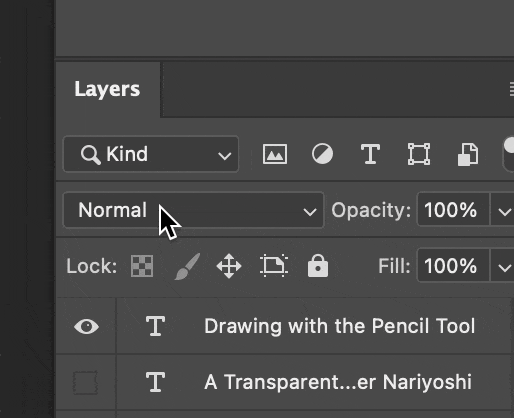
Where to find Layers Panel
Definition: Think of layers in Photoshop as a stack of transparent sheets, each holding different elements like images, text, or shapes. They can be combined to form complex images.
Benefits: The ability to edit each layer independently offers immense flexibility. You can experiment and refine your image without altering the original components. Imagine each layer as a distinct element in a collage that you can manipulate without affecting the others – this is the essence of Photoshop's non-destructive editing power.

Layers Panel in Adobe Photoshop
Practical Steps:
Open Photoshop and create a new project.
Notice the background layer in the Layers Panel; it's your canvas.
Add a new layer by clicking the “New Layer” “+“ icon at the bottom of the panel.
2. Types of Layers

Adjustment Layer Options

Adjustment Panel Options

Text Layer

Smart Object
Image Layers: Standard layers for adding photos or artwork.
Adjustment Layers: Use these to tweak colors and tones without affecting the actual image. Below are some common ones that I use
Levels:
Definition: Adjusts the intensity levels of shadows, mid tones, and highlights in an image.
Location: Layer → New Adjustment Layer → Levels.
Shortcut:
Ctrl + L(Windows) /Cmd + L(Mac) - Opens the Levels dialog, but not as an adjustment layer. To create an adjustment layer: Alt-click the 'New Adjustment Layer' icon and select 'Levels'.
Curves:
Definition: Allows more precise control over the tonality and contrast by manipulating points on a curve graph.
Location: Layer → New Adjustment Layer → Curves.
Shortcut:
Ctrl + M(Windows) /Cmd + M(Mac) - Opens the Curves dialog, but not as an adjustment layer. To create as an adjustment layer: Alt-click the 'New Adjustment Layer' icon and select 'Curves'.
Brightness/Contrast:
Definition: Simple adjustments to make an image brighter or darker, and to increase or decrease contrast.
Location: Layer → New Adjustment Layer → Brightness/Contrast.
Hue/Saturation:
Definition: Alters the hue (color), saturation (intensity of the color), and lightness of the entire image or selected colors.
Location: Layer → New Adjustment Layer → Hue/Saturation.
Shortcut:
Ctrl + U(Windows) /Cmd + U(Mac) - Opens the Hue/Saturation dialog, but not as an adjustment layer. To create as an adjustment layer: Alt-click the 'New Adjustment Layer' icon and select 'Hue/Saturation'.
Solid Color Layers (personal fav for re-coloring): A solid Color layer is a type of adjustment layer that allows you to apply a uniform, solid color over your image. It's an incredibly useful and versatile tool for various purposes in image editing and graphic design.
Text Layers: Automatically created when you add text.
Shape Layers: Ideal for vector shapes.
Smart Objects: Preserve the original data of images, allowing non-destructive edits.
Practical Steps:
To add an Adjustment Layer, click the “New Adjustment Layer” icon and choose, for example, ‘Brightness/Contrast’.
Use the Text tool to create a Text Layer and type your text.
Draw a shape to see a Shape Layer in action.
3. Working with Layers

Click on the ☰ on the Layers Panel to find all the layer modification options
Layers Panel: Your command center for managing layers.
Hot tip: Click on the ☰ on the Layers Panel to find all the layer modification options
Creating and Deleting Layers: You can add layers via the Layer menu or the Layers Panel.
Renaming and Organizing: Rename layers for better organization.
Blending Modes: Experiment with how layers blend by selecting different modes.
Opacity and Fill: Adjust these to control transparency.
Where to change blending mode on Layers Panel
Practical Steps:
Right-click on a layer, or double-click the layer name to rename it.
Experiment with Blending Modes located at the top of the Layers Panel.
Adjust Opacity and Fill by moving their respective sliders.
4. Advanced Layer Techniques
Understanding different types of masks in Adobe Photoshop can really up your illustration game, which I have written a more comprehensive guide for Adobe Photoshop in detail
For a quick overview:
Layer Masks: Add a mask to hide or reveal parts of a layer.
Clipping Masks: Use the content of one layer to define the visibility of another.
Layer Styles: Apply effects like shadows or glows.
Linking and Merging Layers: Combine layers for unified editing.
Layer Comps: Save various states of your work for comparison.
Practical Steps:
Add a Layer Mask by clicking the “Add Layer Mask” icon.
Create a Clipping Mask by placing one layer beneath another, right-clicking, and selecting “Create Clipping Mask”.
Explore Layer Styles by double-clicking a layer to bring up the effects menu.
5. Tips for Effective Layer Management
Use Layer Groups: Keep related layers together in a group. (select all the layers you want to group, press command + G)
Name Your Layers: Clear naming reduces confusion.
Color Code for Clarity: Right-click on a layer to add a color label. Click on the ☰ on the Layers Panel
Lock Layers: Avoid accidental edits by locking layers.

Color codes for layers
Practical Steps:
Drag related layers together to create a group.
Lock a layer by clicking the ‘lock’ icon at the top of the Layers Panel.
‘lock’ icon at the top of the Layers Panel.
Conclusion:
Layers in Photoshop are a powerful tool for anyone looking to enhance their Illustration craft. By mastering layer management and techniques, you unlock a new realm of creative possibilities. Practice these steps to develop an efficient and effective workflow that leverages the full potential of Photoshop's layer system.

About Esther Nariyoshi
Hi, I'm Esther, a multidisciplinary illustrator and digital brush creator who loves exploring all mediums, from paper to pixels. I've collaborated with Cloud9 Fabrics and MSU Broad Art Museum, been featured in UPPERCASE Magazine, and share my creative process through Esther's Art Lab, where I teach illustration courses that bridge traditional and digital workflows. My heart finds joy in food and nature illustrations, and I'm passionate about helping artists preserve the authentic energy of hand-drawn work across any medium.

Skip the guesswork and find your digital match. Learn the entire illustration process from paper to pixels. See how Procreate, Photoshop, and Illustrator handle three projects, then choose the one that fits your style.

Skip hours of sifting through generalized tutorials, and enjoy a personalized learning session with a laser focus. In a 1-on-1 session, you will receive personalized instruction on how to elevate your digital illustration to the next level based on your own artistic style and preference using Procreate, Adobe Illustrator, and Photoshop, as well as your paper sketchbook.


Premium Digital Brushes for Artists: Created by an Illustrator, for Illustrators. These expertly crafted digital brushes are designed to enhance your artistic workflow in digital illustration.

Free Procreate Brushes Free Adobe Illustrator Brushes as well as other helpful resources to get you started in digital Illustration
Next Steps

Beginner friendly classes on Adobe Illustrator