
How to Save a Brush Preset in Photoshop: A Step-by-Step Guide
Photoshop's brush tool is incredibly versatile, allowing artists to create a wide range of effects. One of the most useful features is the ability to save customized brush settings as presets. This blog post provides a straightforward guide on how to save a brush preset in Photoshop, ensuring your favorite settings are always at your fingertips.
Understanding Brush Presets:
What is a Brush Preset? A brush preset in Photoshop is a saved brush with specific settings like size, shape, texture, and dynamics.
Why Save Brush Presets? Saving brush presets speeds up your workflow, allowing you to quickly access your favorite or frequently used brushes without needing to reset the parameters each time (because Adobe Photoshop automatically resets the brush back to the original settings once you leave a brush)
Step-by-Step Guide to Saving Brush Presets:

Location of the Brushes Panel
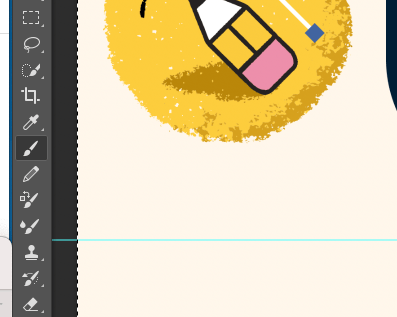
Location of the Brushes Tool
Open the Brush Panel:
Start by selecting the Brush Tool (B).
Open the Brush Panel by going to
Window > Brush Settingsor by clicking the brush icon in the top options bar.
Adjust Your Brush Settings:
Customize your brush to your liking. This could include changing the size, hardness, shape dynamics, scattering, texture, etc.
Play around with the settings until you achieve the desired effect for your brush.
Save the Custom Brush Preset:
Once you're happy with the brush settings, click on the menu icon in the upper right corner of the Brush Panel.
Select
New Brush Preset...from the dropdown menu.Name your brush preset something descriptive. This will help you easily identify it later.
Managing Your Brush Presets:
After saving, your new brush preset will appear in the Brush Preset Picker and the Brush Panel.
You can manage your presets by deleting old ones or organizing them into groups for better workflow.
Using Your Saved Preset:
To use your saved brush preset, simply open the Brush Preset Picker or the Brush Panel.
Click on your saved preset, and it will automatically load all the settings you saved.
Tips for Organizing Presets:
If you have a large number of brush presets, consider organizing them into folders or groups based on their use case, such as painting, detailing, texturing, etc.
Here an example of an organized Brush collection, created by the Author


About Esther Nariyoshi
Hi, I am an illustrator who loves exploring both traditional and digital mediums. I've had the joy of collaborating with some wonderful folks, like Cloud9 Fabrics, and MSU Broad Art Museum, and sharing some tidbits of my creative process through UPPERCASE Magazine. My heart finds joy in food and nature illustrations, and occasionally, I share my creative process on my YouTube Channel. If you love art or need inspiration, join me on Skillshare or YouTube tutorials.

Skip hours of sifting through generalized tutorials, and enjoy a personalized learning session with a laser focus. In a 1-on-1 session, you will receive personalized instruction on how to elevate your digital illustration to the next level based on your own artistic style and preference using Procreate, Adobe Illustrator, and Photoshop, as well as your paper sketchbook.


Premium Digital Brushes for Artists: Created by an Illustrator, for Illustrators. These expertly crafted digital brushes are designed to enhance your artistic workflow in digital illustration.

Free Procreate Brushes Free Adobe Illustrator Brushes as well as other helpful resources to get you started in digital Illustration
Next Steps

Beginner friendly classes on Adobe Illustrator